Introduction
For educational and reverse-engineering purposes only. Do not use on online servers.
I wanted to start a small series for creating internal DLL cheats for killing floor. Killing Floor is a cooperative first-person shooter survival game released in 2009, where players fight through increasingly difficult waves of enemies before a final boss round. You are able to buy weapons and gear after each round with a trader.
By going internal, we bypass the overhead of Windows API functions like ReadProcessMemory and WriteProcessMemory. Instead, we operate within the game’s own memory space, allowing us to interact with objects using direct pointers just like the game’s original developers.
Player* localPlayer = (Player*)playerBase;
localPlayer->health = 1337; // so ez!
localPlayer->x = 1.0f;
localPlayer->y = 2.0f;
localPlayer->z = 3.0f;
Quicklinks
- Introduction
- Finding the Z Cords In Memory
- Finding a Valid Pointer to the Z Cord
- Creating C++ Code to Represent Our Player
- Creating Internal Cheats to Read the XYZ Cords
Finding the Z Cords In Memory
I normally start by finding the XYZ cords of the local player first since it is generally easy to accomplish. In this instance we will find the Z cord first. The other cords will be close in proximity to the Z in memory.
X = left / right
Y = forward / backward
Z = up / down  ← height
Start by loading up a solo game and connect Cheat Engine to the handle of killing floor. Stand still in game, and search for an unknown initial value float.
Then find an area in the map where you are at a higher elevation, go back into cheat engine and scan for an increased value.
Then go to a lower elevation and search for a decreased value
Keep repeating these 2 steps above until you have only around 10 addresses left. Please ensure you have simple values only on.
Next add all the addresses above to your address list and attempt locking them, if your character starts to freeze / glitch out when you jump you found the correct value. In my case the memory address was 0x3196E154.

Finding a Valid Pointer to the Z Cord
The next step is finding the pointer to this value where the base memory address is the local player object. This way we can map these memory endpoints (e.g: health, xyz cords, ammo) to actual class variables. To perform a pointer scan we need to left click the realZ memory address in the address list and select “Pointer scan for this address”.
Then in the pointer scan options set the max level to 2. Then click “OK”.
When the pointer scan is complete you should see around 90 results.
The next step is straightforward: keep restarting the game while leaving the pointer scan open. After each restart, reattach Cheat Engine to Killing Floor, load into a game, and rescan the target process to filter out any invalid pointers. Continue adding the remaining valid pointers to your address list and removing the invalid ones as you repeat this process.

By repeating this process I ended up with a small list of pointers. I kept loading up a game and freezing the pointers to see if it affected my Z cord in game eventually I landed with the pointer attached to Core.dll with only one offset.

Finding the Pointer to the XY Cords
Now with a pointer to the Z cord mapped we should be able to find the XYZ cords also close in memory, use CTRL+C and CTRL+V to make a copy of the pointer and use the arrows to cycle forward and backward in memory.
Selecting the arrow once resulted in me finding the X cord. I confirmed it was the X cord and when I attempted to move left/right I noticed my character freezing.
Then by clicking the left arrow one more time we find the Y cord.
With them all added:

Creating C++ Code to Represent Our Player
1. Finding the Entry Point
First, we need to find where the player starts. We do this by getting the address of the DLL and adding the static offset we found in Cheat Engine.
// 1. Get the start of the DLL in memory
uintptr_t coreModule = (uintptr_t)GetModuleHandleA("Core.dll");

// 2. Add the offset to get the Pointer's location
uintptr_t basePointerAddr = coreModule + 0x00168A4C;

// 3. De-reference: Follow the pointer to the actual Player data
uintptr_t playerBase = *(uintptr_t*)basePointerAddr;

// 4. Cast: Tell C++ to treat that memory address as our "Player" class
Player* localPlayer = (Player*)playerBase;
2. Mapping the Structure with Unions and Padding
When we cast our playerBase to a Player* class, we are essentially laying a stencil over raw memory. However, the data we want (XYZ) doesn’t start at the very beginning of that block. We use char pad_xyz[0x14C] to ‘push’ our variables down to the correct offset.
To handle multiple offsets in different locations, we use a union. A union allows multiple structures to occupy the same memory space. This lets us “skip” unnecessary data using a char array (padding) without losing track of the object’s start.
class Player {
public:
    // A Union lets us define different "views" of the same memory block
    union {
        struct {
            // We know Y is at 0x14C.
            // We create a 'pad' (empty space) of 332 bytes (0x14C)
            // to move our "cursor" to the correct spot.
            char pad_xyz[0x14C];

            float y; // Now this aligns perfectly with 0x14C
            float x; // 0x150 (y + 4 bytes)
            float z; // 0x154 (x + 4 bytes)
        };
        // You can add more structs here for Health, Perks, etc.
    };
};
Creating Internal Cheats to Read the XYZ Cords
We can now use the following code to read the XYZ cords. In order to see output we need to allocate a command console we can do that with the following function.
1. Allocating a Console for Output
// This just allocates a console for output since, a DLL doesnt create one by default.
void CreateConsole() {
	// open a command console findow
    AllocConsole();
    // init stout, stderr, and stdin
    FILE* f;
    freopen_s(&f, "CONOUT$", "w", stdout);
    freopen_s(&f, "CONOUT$", "w", stderr);
    freopen_s(&f, "CONIN$", "r", stdin);
    std::cout.clear();
    // Now we have output!
    std::cout << "[+] Console Allocated Successfully!" << std::endl;
}
2. Cheat Loop Which Reads the XYZ Cords
Then we need to define the main loop where our cheat logic will happen:
// this is our main loop where our cheat logic runs
void CheatLoop() {
    uintptr_t coreModule = (uintptr_t)GetModuleHandleA("Core.dll");
    uintptr_t basePointerAddr = coreModule + 0x00168A4C; // Localplayer object
    while (true) {
        uintptr_t playerBase = *(uintptr_t*)basePointerAddr;
        // if the playerBase is not a nullptr
        if (playerBase) {
            Player* localPlayer = (Player*)playerBase;
            // Just like that we can read the xyz cords of the user!
            std::cout << "X: " << localPlayer->x << std::endl;
            std::cout << "Y: " << localPlayer->y << std::endl;
            std::cout << "Z: " << localPlayer->z << std::endl;
            Sleep(30); // we dont wanna destroy the CPU so we sleep zZzZz
        }
    }
}
3. MainThread
Then lets create our main function which will allocate a console and also run the CheatLoop().
DWORD WINAPI MainThread(LPVOID lpParam) {
	HMODULE hModule = (HMODULE)lpParam;
	CreateConsole();
	CheatLoop();
	return 0;
}
4. Modifying DLLMain
Finally we modify our DLLMain to call this thread when the DLL is attached.
BOOL APIENTRY DllMain(HMODULE hModule, DWORD ul_reason_for_call, LPVOID lpReserved) {
        switch (ul_reason_for_call) {
		// When the DLL is attached....
        case DLL_PROCESS_ATTACH:
            DisableThreadLibraryCalls(hModule);
			// Launch MainThread() under a new thread...
            CreateThread(nullptr, 0, MainThread, hModule, 0, nullptr);
            break;

        case DLL_PROCESS_DETACH:
            FreeConsole();
            break;
        }
        return TRUE;
    }
5. Full-code
// dllmain.cpp : Defines the entry point for the DLL application.
#include "pch.h"
#include <windows.h>
#include <iostream>

class Player {
public:
    union {
        // Define Y at 0x14C
        struct {
            char pad_xyz[0x14C];
            float y; // 0x14C
            float x; // 0x150
            float z; // 0x154
        };
    };
};

// This just allocates a console for output since, a DLL doesnt create one by default.
void CreateConsole() {
    AllocConsole();
    FILE* f;
    freopen_s(&f, "CONOUT$", "w", stdout);
    freopen_s(&f, "CONOUT$", "w", stderr);
    freopen_s(&f, "CONIN$", "r", stdin);
    std::cout.clear();
    std::cout << "[+] Console Allocated Successfully!" << std::endl;
}

// this is our main loop where our cheat logic runs
void CheatLoop(HMODULE hModule) {
    uintptr_t coreModule = (uintptr_t)GetModuleHandleA("Core.dll");
    uintptr_t basePointerAddr = coreModule + 0x00168A4C;
    while (true) {
        uintptr_t playerBase = *(uintptr_t*)basePointerAddr;
        if (playerBase) {

            Player* localPlayer = (Player*)playerBase;
            std::cout << "X: " << localPlayer->x << std::endl;
            std::cout << "Y: " << localPlayer->y << std::endl;
            std::cout << "Z: " << localPlayer->z << std::endl;

            Sleep(30);
        }
    }
}

// Allocates a console and jumps to CheatLoop()
DWORD WINAPI MainThread(LPVOID lpParam) {
	HMODULE hModule = (HMODULE)lpParam;
	CreateConsole();
	CheatLoop(hModule);
	return 0;
}

// This is whats called when our dll is injected
BOOL APIENTRY DllMain(HMODULE hModule, DWORD ul_reason_for_call, LPVOID lpReserved) {
        switch (ul_reason_for_call) {
		// When the DLL is attached....
        case DLL_PROCESS_ATTACH:
            DisableThreadLibraryCalls(hModule);
			// Launch MainThread() under a new thread...
            CreateThread(nullptr, 0, MainThread, hModule, 0, nullptr);
            break;

        case DLL_PROCESS_DETACH:
            FreeConsole();
            break;
        }
        return TRUE;
    }
6. Results
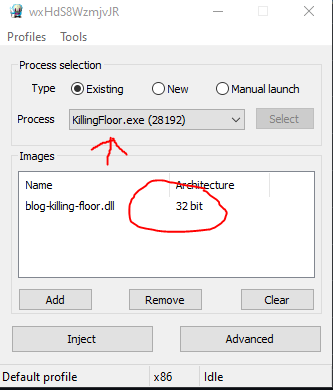
I then used the Xenos injector to inject my x86 Release DLL to Killing floor and confirmed the XYZ cords were being read successfully.
Once we inject the DLL we can see the output of our cheats matches the values in Cheat Engine.
